Friday 30 November 2007

The nooks of deboning a drumstick

This is the way we debone our drumstick...


so you can stuff it with stuff :


like so :


and then you get this :)

Friday 2 November 2007

Wow a New Post!

So it occurs to me that I really really should update this blog ;-)

(And I do!)

Just been going over foodie pics on my desktop to see whatelse I should write about next (I should really write that I'm getting my kitchen overhauled!)

Found this one which I thought was pretty good to post ;-)


Is it any wonder why Thai food tastes so good?

Saturday 20 October 2007

first chips


fan cooked.
in the spanking brand new oven
in the spanking new kitchen.

Sunday 29 July 2007

the ultimate carrot cake - pic


the original ultimate carrot cake.

Tuesday 24 July 2007

Nosh Recipes : Ultimate Carrot Cake ala Tropicale - Version 1.0

It's an adaptation of Aunty RW's recipe and still a work in progress but we have pics!
I call it Carrot Cake ala Tropicale because it contains pineapple which is a rather pleasing addition to your usual version. Here I've omitted the nuts because our family aren't big on cooked nuts - but I think a sprinkling of chopped pistachios with the icing might be something to try in version 1.1

Ingredients list for carrot cake
Aprox. half kilo carrots (cleaned and finely grated)
300 gms self rising flour
250 gms moscavado/brown sugar (however I think that molasses/dark brown cane sugar will make a better product)
1/2 tsp salt
3 tsp cinnamon powder
twist of nutmeg
4 eggs
1/2 cup vegetable oil ( or here they have product made from vegetable oil that has a buttery taste and I would recommend that as an alternative)
2tsp vanilla essence
150 gms canned pineapple chunks chopped (although in here I've used dry which I would not recommend as it is terribly fibrous)
1/2 cup raisins/sultanas (depending on how much you like the stuff or how fruity you wish to make your cake really)
Optional 80g. walnuts/peacans (as per aunty's recipe)

Ingredients list for cream cheese frosting*
*To make frosting simply whisk together all the following ingredients
1 tub 200gms Philadelphia light spreadable cheese (or equivalent)
200gms icing sugar
50gms butter
zest from 1/2 lemon

Method
I tend to mix all the wet ingredients together first before adding in the dry. Therefore mix carrots, pineapple chunks, raisins and sugar together first.
Then, add the 4 eggs, oil and vanilla essence till well integrated.

Then begin sifting in the dry ingredients i.e. In sieve, place together the self raising flour, salt and cinnamon powder introducing this into the wet ingredients by sifting and folding in.


Finally, add a twist of nutmeg to the mix and stir in; then transfer cake batter to a baking tin lined with buttered grease proof paper. Bake in a moderately hot oven (aprox. 200 - 220 degrees Celsius) for 20-30 minutes. To check if cooked through, pierce center of cake with a bamboo skewer. If the cake is ready, the skewer should come away clean. If otherwise, replace cake in oven and bake an additional 5-10 minutes and repeat the test.

Empty cake onto a cooling rack when removed from the oven and remove grease proof paper.


To finish, flip cooled cake over and cover with cream cheese frosting. Place in fridge to set icing and voila - perfect cake to go with your next coffee break!

Aunty RW's Carrot Cake

My Aunty RW. made what I think of as the closest to ultimate carrot cake.
Beautifully moist in texture and ever so easy to put together although admittedly when I made it, I did not follow the original recipe. However it did result in an even simpler to put together carrot cake although I'm still playing around with the process to make the cake more moist. I find that it can get quite stoggy (thick) and dense in texture.

Apparently my mom used to make carrot cake just to make sure my brother and I ate our vegetables!

[ d e f i n i t i o n ]
Ultimate Carrot Cake
Moist crumbly texture without being cloyingly sweet. Must have slight fibrous crunch of finely shreded carrots, and be some how light although choc-a- bloc full of ingredients. False sense of being somewhat healthy and good for you! Must also be iced with Ultimate Cream Cheese Frosting.

Aunty RW's Recipe
Carrot Cake

500g carrots, grated
300 flour
250 brown sugar
2tsp baking soda
1tsp baking powder
_ tsp salt
3 tsp ground cinnamon
4 eggs
_ c vegetable oil
2ts vanilla essence
150g pineapples, chopped
80g raisins
80g walnuts or pecans, toasted and chopped

Preheat oven to 175C, prepare 12” x 8” pan.
In large bowl, sift flour, baking soda, baking powder, salt, cinnamon powder and combine with brown sugar, mix well. Add carrots and raisins. Mix well.
Add vanilla to eggs, beat slightly.
Add eggs, oil, pineapple, nuts to flour mixture and stir until all moisten.
Pour into prepared pan, bake 30-40 mins or until toothpick inserted into cake centre comes out clean.
Allow to cool for 15 mins, turn onto rack to cool.


Thursday 19 July 2007

Updates!

So back in England now and unfortunately on landing I got really sick with some strange bug I probably caught off the plane - so haven't really done anything other than groan and shiver in bed. Today however is a good day and probably the first since I've joined the land of the living.

Whilst I was back home in Singapore my Aunty RW. made this super carrot cake and I'm so inspired I'm going to try the recipe she sent today ( I have a couple of hours)
Also I have to say I got really inspired by the time I spent living with my Grandma and how she was able to knock up a super delicious kuay teow soup in all of 10 minutes just so the pincilla could have lunch!

So impressed I decided that I'd remember that and make more meals at home rather than coping out and ordering a chinese take away! I forget that meals don't have to be complicated to be enjoyable. They can be simple and nutritious!

I especially loved the garlic and spinach soup I was imbibing every other day as that is my nan's staple diet . Teehee - so much healthy home cooked food I have to say I didn't miss the usual hawker fair - My grandma even made some fantastic chicken rice which really fulfiled my hearts desire ;-) I think I put on a ton of weight though.

Anyway I shall try to faithfully take photos of today's carrot cake shinnanigans.
Also I'm out of kaya so I thought I'd make up a batch along with ye olde carrot cake.

Found a fab recipe online here http://www.makantime.com/kaya.htm

Thursday 26 April 2007

The Wah Piang Update!

Ok ok so it's taken a while plus I've been travelling back to the old "fried rice paradise" and so on - Finally got the chance to get round to updating this blog again.

Just off the top of the head some of the things I would like to write about as follows :

Our meal at Doc Chengs.
We had the most excellent lamb we (brother, me, Pin, Liam) (though somehow Doc Chengs isn't as spectacular as I remember it to be - Pin says it's probably because I'm a more experienced foodie since when I used to go to it)
The Lamb was best though - a really exciting tastebud teaser - tender lamb chops marinated in what tasted like a hi-breed between a satay and blackpepper sauce : that is you had all the sweet honeyed glaze of marinated satay style meat - combined with the piquancy of (for lack of a better description) black pepper crab! I think I've definitely got to do some experimenting with those sort of flavours.

Wolfberrys and foie gras [Fwaaah graa]
This seems to be the thing to eat in Singapore these days - everywhere we went there was foie gras * and every drink and dessert that was purportedly healthy for you had wolfberrys in it.
*mild rant about foie gras tempura - now I have to say that is the MOST pointless thing I've eaten - whatever taste there was to the foie gras was masked completely by the tempura batter which kind of ticked me off really. I really don't see the point in that one!

Our stay at the Gallery Hotel and TCC.
Unfortunately we didn't really eat there much nor order room service, because it was conveniently located by some fantastic places to eat (plus family etc.. insisted on taking us around and cooking for us we really only stayed in the hotel to ZZzzz! and swim)

Our Many Japanese Foodie Experiences
We ate at a really fab place in Central© called Sho-u serving contemporary Japanese - of note is the absolutely divine unagi with silken tofu tempura which is a taste sensation. I also picked up a neat idea for summer drinking which is a cocktail made from green tea and creme de menthe - well the cocktail at the actual place didn't contain alcohol so the creme de menthe is my idea. We seem to have eaten alot of japanese this time around and had the most amazing Udon at this place in Orchard (ah pity the name escapes me but I will ask my brother as it was his treat that time) - It's really made me want to experiment with making my own udon - just by coincidence there was a film showing on the plane called Udon too which was fantastic (it's an omen)

Home Cooking
My grandmother is the queen of pickles I think! She's now made this new sort of achar that doesn't require salt or vinegar - the taste is simillar to a thai salad , using lime juice instead of vinegar as a pickling agent with sugar. Anyway if she can make Pin eat pickles and like them, it's nothing short of miraculous! Mom's been making her idea of the perfect pineapple tart and I spent some time with her making these whilst she tweaked the pastry. She's given me some pineapple jam and moulds with which to make my own tarts and soI'll have to try and experiment with making different sort of fillings with the fruits of the season.

Aunty Rachel's Restaurant.
Just the day before we were due to leave, Aunty Rachel gave our whole family a treat at her restaurant. Some really fantastic fare which I must write about.

The Dun Cow
I've been meaning to write about the Dun Cow for a while - this was before my trip out to SG. It's a pub we sort of stumbled acrossbut it also has the most fantastic food!


And thats' that... (well for the next 8 or so entries anyway)

Thursday 15 March 2007

Noshlog : Constant Cravings

A new entry has been some time coming, mostly because I fell ill and then I got busy with ... er... stuff - so my journaling has had to take a seat.

My nan worries about me turning into an alcoholic from all my wine making. She really doesn't need to worry - for me the joy is less in the consumption and more in the making. I think that can be said about alot of cooking.

Don't get me wrong, I most definitely enjoy my noshing - but for anyone who has ever slaved away in the kitchen preparing a meal; the joy is in the enjoyment that others have when they partake of your labours.

Now that Ive figured out how to bluetooth (or blur toof) images from my p990 over to my mac, I'll post a few more pictures that aren't by the pincilla.

If your foodie obsession extends to computer gaming then perhaps you might remember an old arcade style game called "Burger Time". Recently I've had gaming nostalgia and went in search of those sort of games.

I found a pretty good page for it here, although the key commands aren't quite the same as joystick fun.


After almost a month of craving for thai food but not quite having any, TSU (The Spousal Unit) took me to the Mai Thai in Harbourne which has fairly decent fare - in an "interpreted for gentler palattes" sort of way.

Being sorely dissapointed at the lack of searing heat on my tongue, I embarked on a full on Thai Food rampage and attacked a meal in Chesterfield with one of my friends for lunch the very next day. Surprisingly good, though just not hot enough - so guess what we had for dinner yesterday?

Yup it was Thai.
This time I made it myself.

Wednesday 7 February 2007

Nosh Lab : Home Wines and Passion Fruit Wine Recipe


I started to make 'Country Wine' in 2005 having tasted the labours of one of my friends who'd been making her own wine for quite a number of years! It was unlike anything I had ever tasted before and that spurred me on to find out how to go about making some of my own.

I bought a book and my first wine kit. (As back-up incase my own experiment turned into vinegar - me and my fear of failure!?) So the very first Nosh'lette vintage is a Cabernet Sauvignion 2005 (as depicted in above picture). After I'd got the gist of how to make wine (it really isn't all that difficult), I made my first 'from scratch' out of strawberries which produced a most unusual, subtle and pleasing wine. The nice thing about making your own wine is that it also makes a unique gift - and when you start giving away your own bottles of wine; people start giving you things to encourage your wine making habit. Pretty soon I found myself acquiring 7 demi johns, each producing 6 bottles of wine. Strangely though, the demand from friends and family outweighed the amount of wines we were producing. Trust Liam to bring in the industrial revolution and whilst I was out visiting with friends in London, he brought in the 5 gallon fermentation buckets! (Talk about kitchen gadgetry!)

Pic : Wine all over my kitchen counter tops.
You can just see the 5 gallon bucket on the floor looking deceptively small!

On one of my trips back to Singapore, I decided to take across a home brew kit just to see if making wine from tropical fruits was a viable idea. The wine making yeast thrives best in warm climes but dies in anything above 30 degrees C. Also it doesn't like sudden fluctuations in temperature. It's funny thinking back on it as the fermenting wine ended up living in a bucket of water in the coolest part of the house - The Kitchen bathroom!

This pic is of my wine making experiment in SG.
1) I used a plastic demi john but really any 2 litre water bottle with a screw top will do as long as you can keep it sterile. 2) A picture of your little wine making buddies - the yeast 3) The demi john is fitted with a fermentation lock - basically it's a bendy tube filled with water so carbon dioxide formed by the yeast can escape through the water but nothing from the atmosphere enters the bottle. Clever huh? 4) Fermentation is relatively fast in SG. and a clear wine was achieved in the space of a week and a half or so.

Of all the wines that I have made, the most interesting wine has been a pineapple and coconut wine - I say interesting I didn't say nice! We made it for a niece who hated wine and loved Malibu. The wine which I am most pleased with is my own passion fruit wine. The passion fruit itself has such an interesting smell, part floral, part citrus and part fruit...
Making it into wine produces a pale yellow/white wine that is crisp in flavour with a stunning nose! I thought I would share this as it is also a real cheat's approach to making wine; I am sure many foodies may be appalled at the idea, but it does work! I think in the end,more so when it comes to a home brew, the fun is less in the making and more in the drinking!

The Noshlette's Passion Fruit Wine Cheat!
To make 1 gallon of wine (6 X 75cl.)

Ingredients
4 litres passion fruit juice (yes, from a packet!)
1 litre white grape juice
(also from a packet!)
300g fructose or brown sugar
1 pkt wine yeast (you can actually use bread yeast if wine yeast is unavailable)
1 tea bag steeped in 3tbsp hot water for 5 minutes*
juice of 1/2 lemon
1/2 cup raisins chopped

Mix all the above ingredients (except the yeast) in a fermenting bucket or gallon container that is completely clean and food safe. Make a fermentation starter by simply adding yeast to a small dish full of sugar water (tbsp sugar to 2 tbsp water) - when the yeast starts to bubble, the whole thing is added to the wine mix (also known as a must).
Leave for 1 week in a warm (12 - 30 deg.) dark place, stirring the must once every day to get rid of the build up of c02. If using a fermentation lock, simply swirl the whole container. At the end of the week, strain the must through a sieve into another clean gallon container and leave to clear. If campden tablets are available - use 1 crushed tablet to help in clearing. However this is not necessary, the wine will simply take a longer time to clear.

Wine is more or less drinkable when it is crystal clear (aprox. 30 days) - however for complex flavours to develop - let the wine mature atleast 6-10 months.

*Tea must be made from tea leaves and not herbal infusions as it is the tannin from tea that is desired

Nosh Recipes : Shepherd's/Cottage Pie

I started making this dish back in my early teens and the basis of the recipe is for Shepherd's Pie from "Australia Womens Weekly".
The essential difference between Shepherd's and Cottage pie is ingredients. A shepherd's pie is made with Lamb mince and a Cottage pie is made with beef. Strictly speaking, this would not be considered either a shepherds or cottage pie and is more of a " Rojak Pie"! The methods stay mainly the same i.e pie filling, crusted over with mashed potato and then baked in the oven. I always find it a useful one dish meal to prepare and it seldom fails to please.

The recipe has also altered quite a bit since my teens where I was less health concious and would use a half stick of butter which is closer to the original. The pictures here depict another variant I concocted with what was to hand at the time.

The basic recipe is as follows:

Main Ingredients
dice 4 medium carrots
dice 1 large brown onion
finely chop 1 clove garlic
chicken stock cube or 1 cup chicken stock
1 Bay leaf
few sprigs of fresh thyme
1 tbsp wild oregano
white pepper
salt
aprox. 35gms butter
2 tbsp plain flour
olive oil
250gms meat minced
(I find a mix of meats such as Chicken and Pork make for better texture and flavour than just pork , lamb, turkey or beef.)
4-6 potatoes to make a mash
(alternatively use instant mash - more convenient but less flavoursome or nutrient rich)


Method :
Melt butter with a bit of olive oil (This prevents the butter from burning) then saute onions, garlic and carrots together with oregano, thyme, pinch of salt and pepper. When these start to soften and brown, add minced meat and bay leaf. Cook through and sprinkle flour over mixture to combine ingredients.
(In this variation , I have also added mushrooms and tomatoes)


When flour is fully intergrated, add chicken stock (If using stock cube, mix cube with 1 cup hot water first before adding - check seasoning regularly as cubes can be rather salty in itself) Simmer on a low heat till ingredients start to combine and liquor is reduced by half. When done, remove from heat and set aside.

Whilst filling is simmering, you can make the mash simultaneously by boiling up peeled potatoes till they are soft enough to lance easily with a fork.
(In the variation depicted here, I used soft cheese with garlic and herbs in place of adding butter and milk to the mash)


Fill a large oven proof dish with the prepared filling - the flour helps it to combine as a layer. Spoon the mash on top of this and cover the filling with it.
You can rake the top of this mash layer into droves - or any other pattern you fancy. I just tend to lump mine on the top without much fuss.


To finish - Bake the pie at 180 deg. for aprox. 30 - 40 minutes
Use an egg wash on the top of the mash to create an appealing glaze and return to oven for a further 15 minutes.

Serve straight from the oven.

Tuesday 6 February 2007

Other Nosh : Pincilla's aunty's Kerabu Bee Hoon

The Nosh'lette says : The Nook is all about the archiving of family recipes - not just my immediate family, but its extended members too.

As authored by Pincilla

Something about receipes in the family. You have to get them, learn them, before they're gone forever. I'm not a good cook, hardly a cook even. But at least i've got one aunt's meesiam how-to, and now here's another one's kerabu how-to. Never mind that i haven't realllly cooked up a feast for anyone yet, YET. But at least i have them.

Step 1.
The coconut. I think they call it kerisik or whatever it is. (told you i'm not a cook). Get the grated coconut from the wet market, (no skin), and fry it till its dry in the kwali.
Until it looks like this... Brown and dry. apparently this is when it's fragrant.


Step 2
And then there's the finely sliced up 'lotus flower'. (is that what it is? we call it 'ang hwa' in hokkien. i have no idea what it's called in english) the fragrant thing they use in rojak. My aunt being the true blue penangite had brought some with her from penang (but not enough) - those are the pinky bits you see in the pic.

The ones that i got from our market weren't as pretty. The browner ones. Obviously, the pinky bits are more fragrant than the brown ones which weren't as good. You'd know if you could get a whiff of that lovely thing. So *must* get nice pinky ones for best fragrance.

Step 3.
And then there's the coconut milk. Squeeze grated coconut (without skin), add salt, and cook the coconut milk. This will be poured over the bee hoon eventually and mixed well. There's no cooking involved, other than this coconut milk and the frying of the coconut pulp. And the sambal. And the boiled beehoon and bean sprouts. And hard boiled egg.
Step 4.
These are shallots, sliced up. One bowl.


Step 5.

And i wonder... step 5 was already done when i got to her house. It's chili sambal. I'd think it was probably made with blitzed up dried chillis fried in oil. And sugar. And salt. (this is where cooks have to use their best judgement).


Step 6. You need Eggs. Hard boiled. These would be sliced. And prawns. Sliced too. (No closeup of prawns. But you see them in the layout next)


Step 7. Very important. You need Mint leaves. chopped up.


Step 8. Lay them all out on the table. The soaked and boiled bee hoon being the base..


Another view... With lime juice in the bowl. And a jar of sugar.. (not all the sugar gets added! just abit)

Step 9. And this is where it all comes together. Stir in the chili paste, the lime juice The coconut, and the action shot shows that you've got to eventually stir it all up and mix it up nicely.


Until everything becomes a nice mee-siam like colour... And mix in the mint..


Then lay on all the sliced egg and prawn...


Put them in nice pyrex bowls, wrap it all up in cling film and i get to bring one bowl home..


Epilog.

Nosh Lab : Turkey - Katsu

Turkey (shichimenchou)- katsu is what is usually served in my home in place of Ton (Pork) katsu.

Not all Japanese food is about raw fish, although I do suspect that the creation of Tonkatsu which is basically Japanese deep fried pork cutlet in bread crumbs - is a western inspired creation. A more 'traditional' recipe is offered here

The essential ingredients in this dish which make it distinct from other deep fried 
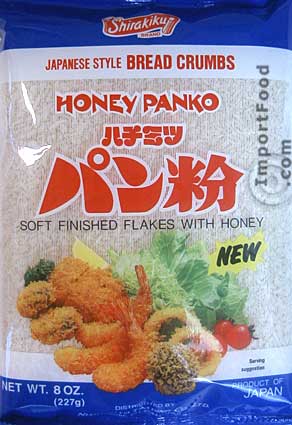
"meat in bread crumb recipes" are :
Bull Dog Tonkatsu Sauce
and Honey Panko Bread Crumbs
-
as well as the assorted condiments that go with the dish.

It is still possible to recreate these recipes without these two essential ingredients - but it just wouldn't be Tonkatsu.


I find that Turkey makes for a better substitution to pork in this recipe , although pork has it's own distinct flavour and texture. In some ways I would say that Turkey is a far better and even healthier choice over making Tori/Chicken Katsu - as I find this can sometimes result in very dry and flakey meat. Whilst I enjoy pork, it is not a meat that is popular in my household for dietary reasons.

Perfection in this dish is achieved by having a crisp dry bread crumb shell encasing tender and succulent meat on the in. The Panko breadcrumb is clever in this way - unlike ordinary bread crumbs (and particularly your sage and onion type of pre boxed crumbs) you will find that Panko breadcrumbs are almost shard like in shape and airy in structure. I speculate that the honey/sugar content in the crumbs helps it to caramelise adding yet another crisp texture within the crumbs themselves. (Conjecture on my part as I have no idea what Panko Breadcrumbs are really made of - just that they work like magic!). If Panko breadcrumbs cannot be got then I would strongly advise making your own from whizzing up stale* white bread - better if the bread is somewhat sweet in nature (ie. brioche or soft dinner rolls)

Serving
4 medium sized turkey steaks

For making bread crumb coating :
1 egg 1 tsp milk 50 grams plain white flour 100 grams Panko bread crumbs

Method :
Blot steaks with kitchen towel to remove excess moisture - then dust with plain flour.

Beat egg and milk together well (you can omit the milk if the egg is large and is enough to coat all your steaks, alternatively use two eggs instead of one)

Arrange your work space so that you have your floured steaks, egg mixture, bread crumbs and holding plate to hand.

Dip each dusted steak into egg and milk mixture till well coated and then coat in bread crumbs. Set aside till all the steaks have been prepared as such and refrigerate for about 10 minutes before deep frying.

When deep frying, make sure your oil is hot enough to cook and seal the coat of breadcrumbs as you immerse your steaks. Reduce the heat if your breadcrumbs are browning too quickly. The crumb coating should be this lovely even golden colour before removing from heat.
Blot excess oil on kitchen paper as you remove the done steaks from the oil. Because the steaks are cold, remember that they reduce the temperature of the oil as you add them. It is better to fry the steaks one or two at a time rather than all in one go so that the temperature of your oil does not drop as drastically.

Serve immediately, accompanied by hot fluffy Japanese rice and assorted condiments (Tonkatsu sauce, Tsukemono - or Japanese pickles, Miso soup, finely shredded white cabbage with QP mayonaise and yellow mustard )

To eat - Dip a slice of your pipping hot katsu into your Tonkatsu sauce***, and shovel in to mouth closely followed by some rice and pickle** - yummy!


*stale is when the bread is a few days old and no longer soft - not when it is mouldy!
** pickles are an acquired taste - the ones shown in this photo are pickled aubergine in red shiso leaves (red perilla).
*** if you are unable to get Tonkatsu sauce, Sainsbury's fruity sauce is a closer equivalent than worcestershire sauce and ketchup. However it is considerably tangier - temper this with a squeeze of fresh lemon juice, 1tsp light soysauce and 1tsp brown sugar.

Monday 5 February 2007

Nosh Lab : Experiments in foodie perfection (Intro)


Often I find that the experiments I do in my kitchen, tend to be about capturing something I have tasted before, or remember quite fondly. Some involve family recipes that have no notations and are perhaps echos of the originals as interpreted by me. Some are about capturing remembered dishes that I have tasted in my travels or restaurant dining experiences; Some are about finding suitable substitutes in the absence of those exotic ingredients. Some are ofcourse things I have simply thrown together because they sounded like a good idea.

Pincilla found it funny that none of the pictures in my blog are taken by me. This isn't all true (or atleast won't all be that true). Granted, most of the pictures you will find here were taken by the Pincilla; I have been known to snap the occasional pic of my own creations.

I look at it this way; My main concern is the taste of the food which is president over taking photos of it for posterity. I am just glad that I have friends who do!

How the blogs labeled 'Nosh Lab' differ from those simply marked 'Nosh Recipes', is their experimental nature. The entries herein contain my own notes, hyperbole, theories and observations.

The Story of Nosh II - My brother, the test subject.

The siblings of people who cook are of utmost importance to the whole research and development process of a foodie - particularly during the formative years. Fortunately, my parents had given me a younger brother on which to experiment.

Brothers with bottomless pits for stomachs make great test subjects because they are game to eat, try and taste - just about everything you make and I really mean that.

I was 13 and had just learnt to make sponge cakes and rock buns in home economics*. My brother and I were hungry. On taking a look at our financial resources, we had a few cents enough to buy some flour and butter, or a packet of crisps.

We lived in an apartment building and the local "mama" shop would sell these sundries. Usually they would have big tubs of flour or rice etc... and would package these bulk items into smaller plastic bags of aproximately 100gms to sell for 50cents.

I mixed :
The flour, butter, and caster sugar together with a 1/2 teaspoon of bicarbonate of soda to make a basic cake mixture - then added raisins and an egg.
I then scooped the mix and divided it in heaped tablespoon portions onto grease proof paper ; setting the oven to 200 deg. to bake what were to be rock buns for about 20 minutes.

Whilst washing the utensils I remember wondering to myself why my hands felt soapy but thought nothing of it ofcouse - afterall, I was washing up!

When the cakes came out they were lovely and well browned. They looked fabulously appetising and I placed them infront of my brother who took one bite.. and gave me a most quizzical look.

"They taste kind of soapy" he said...

Then it all clicked into place - I hadn't bought flour - I had bought washing powder!**


*Now known as Domestic Science

**You might be wondering how daft I was to have bought washing powder instead of flour. Well, the bins in which the flour, rice and (apparently) washing powder were situated side by side. I have no idea why I grabbed the washing powder, thinking it was flour - they were both white to me at the time. I am pleased to say that I haven't made any more soapy tasting cakes to date.

Sunday 4 February 2007

Nosh Recipes : Ultimate Comfort Food - Congee

Congee , also known as Choke or Chinese Rice Porridge is my ultimate comfort food
- the asian equivalent of chicken soup. Often a breakfast sort of food however it can be eaten at all times of the day.


I make quite a few variations of this dish.
The one with salmon is Pin's fav when she comes over to visit.

For me, this dish is never complete without Yu Tiao (Yu Cha Kuay) or Chinese deep fried dough sticks. These are not easy to get in England (fresh ones anyway) and so I've found that grilled yorkshire puddings that have been sliced and crisped up in the oven work well as substitutes.

The basic congee is as follows :

For a small serving of 4 (or two extremely hungry piglets)

2 bowls of rice
4 bowls of chicken stock (or 1 stock cube and 4 bowls of water)
an inch of root ginger that is finely sliced into slivers

seasoning
white pepper
light soy
sesame seed oil

To garnish
Yu Tiao (Or substitute with chopped yorkshire puddings)
fresh corriander leaves
sliced red chilli

Optionals :
Meat or Fish can be added either raw or pre cooked and shredded or sliced in bite sized portions.
If adding cooked fish - leave to last possible minute.
If adding cooked meat, this can be done in midstage where gentle simmering helps combine the meat flavours into the congee itself.
If adding raw meat or fish - add when congee has come to a boil and is still relatively loose in structure. Minced pork can be added (and is done so in local SEA. street fayre) - these are loosely balled and dropped into the boiling congee to cook together.
Any vegetables can simply be added in the last minutes of cooking time to retain maximum nutrient value. Vegetables that require simmering to tenderise are best used in this dish as the nutrients are not lost in the cooking process, but leached into the congee itself.
The pipping hot congee is served immediately - sometimes a raw egg is cracked into the porridge off the heat and this cooks as it is mixed in with the porridge itself.

Method
Bring stock/water to boil before adding rice - reduce to simmer and add sliced ginger.
The grains of rice should start to break up and thicken as you stir the watery mixture.
Thin down with more water if the consistency of the dish is too gloopy.
Season to taste. Add garnish and serve with accompanying dishes *

Plain congee, that is really just boiled rice in water,is often served with a multitude of side dishes and described as Teochew Porridge. (- As depicted in this picture above taken by the Pincilla)

*such as raw fish salad.